Are you getting a Network Error in CapCut?
CapCut is a video editor application used on mobile, web, and computers.
The “Network Error” problem that application users encounter within the application prevents the use of add-ons and makes it difficult to edit videos.
In this guide, we have tried to fix the error by mentioning a total of 6 suggestions on how to fix the error encountered.
What is CapCut Network Error?
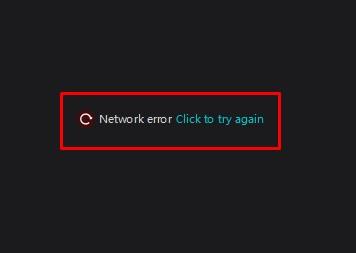
This error prevents app users from editing videos by preventing the use of text-to-speech, effects, stickers, transitions, and other plugins.
We will talk about 6 suggestions in total that we need to follow to fix the error.
These include installing the old app, using VPN, clearing the internet cache, using the web version, using DNS and we may need to reinstall CapCut.
How To Fix CapCut Network Error?
Under this heading, we tried to find a solution by giving information on how to fix the error.
1. Use VPN
CapCut may have blocked plugins from some countries.
For this reason, we can get any VPN application connected to a different location, and check whether the problem persists.
Make a VPN connection by downloading the free Hotspot Shield application that we recommend to you.
Then, if the CapCut application is open, close it completely from the background and run it again to check if the error persists.
2. Use Old Version
If you encounter an error after updating the application, you can eliminate the problem by installing the old version.
We can eliminate the problem by downloading the old version of CapCut by accessing the link below.
After downloading the old version of the application, let’s first uninstall the CapCut application.
After uninstalling the application, install CapCut by running the old version installation.
Once the installation is complete, check the application.
3. Use Default DNS
We can avoid connection request problems by using the default Google DNS server.
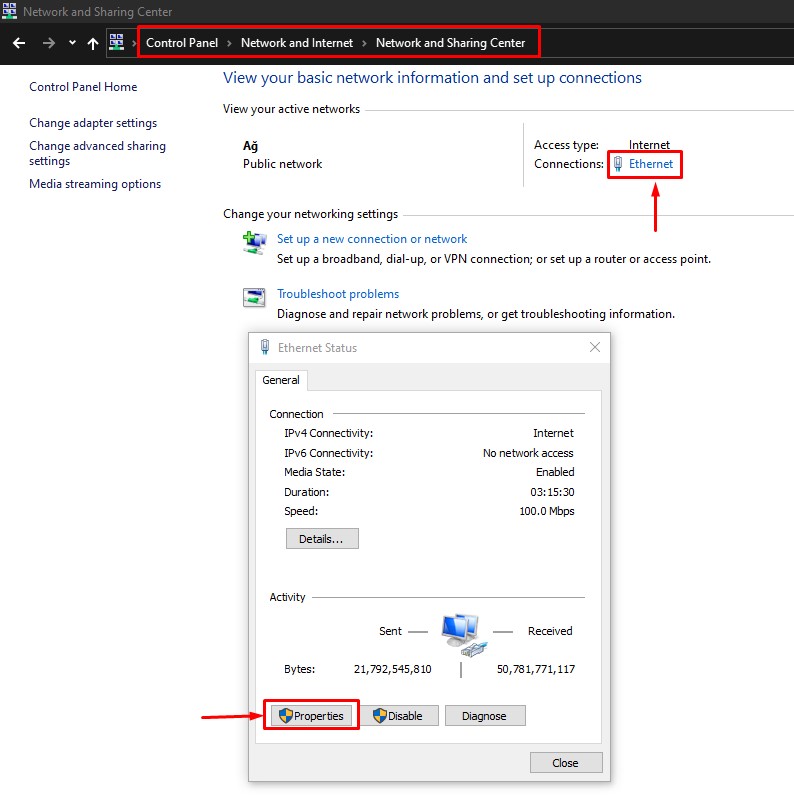
- Type “Control Panel” in the start search screen and open it.
- Click on the “Network and Internet” category title.
- Then click on the “Network and Sharing Center” heading.
- Click on the internet information next to “Connections:” on the screen that opens.
- Then click the “Properties” button.
- Double-click “Internet Protocol Version 4 (TCP/IPv4)“.
- Then check the “Use the following DNS server address:” option and type the address we left below.
- Preferred DNS server: 8.8.8.8
- Alternate DNS server: 8.8.4.4
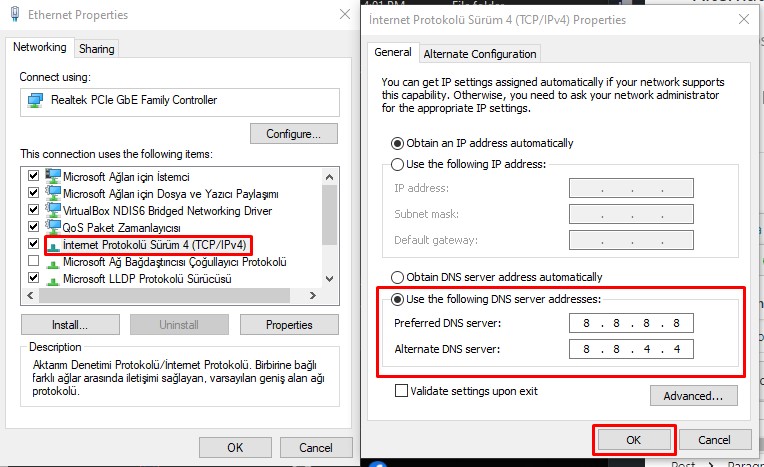
Click the “OK” button to save the setting and check.
4. Clear Internet Cache
The problem with the internet cache can cause you to encounter connection problems.
You can follow the steps below to fix the problems with the internet cache.
- Type “cmd” in the start search screen and run as administrator.
- Paste the following codes in the command prompt window and press enter.
- ipconfig /renew
- ipconfig /flushdns
- netsh int ipv4 reset
- netsh int ipv6 reset
- netsh winhttp reset proxy
- netsh winsock reset
- ipconfig /registerdns
After the process is complete, restart the computer and check.
5. Reinstall CapCut
Damage or corruption in the installed CapCut folder may cause you to encounter various errors like this.
Therefore, you need to completely uninstall and reinstall the CapCut application.
- Type “Run” in the start search screen and open it.
- Type “%localappdata%” in the search screen and open it.
- In the new window that opens, find the “CapCut” folder and delete it.
After deleting the folder, access the official CapCut website and download and install the installation file.
6. Use Web Version
Problems that occur within the application will cause you to encounter various errors like this.
Therefore, you can eliminate the problem by using the CapCut web version.
Access the CapCut website and check if the problem persists by creating a new project.

