

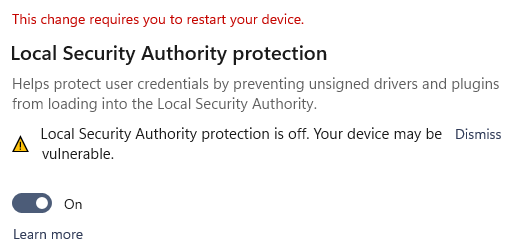
Are you getting a “Local Security Authority protection is off” and “Page Not Available” error in Windows 11?
After the last update, Windows 11 users are reporting that they encountered the error “Page not available” and “The page you are trying to access has no supported features and is not available.” followed by “Local Security Authority protection is off. Your device may be vulnerable” in their firewall.
This guide is for users who encounter “device security page not available“, “standard hardware security not supported“, “core isolation page not available“, “local security authority process” and “local security authority protection is off“, “Page Not Available” error in Windows 11.
- What is Local Security Authority Protection Is Off Error in Windows 11?
- How To Fix Local Security Authority Protection Is Off Error?
- Fix 1: Repair Windows Security
- Fix 2: Changing RunAsPPL Values
- Fix 3: Uninstalling Windows Latest Update
What is Local Security Authority Protection Is Off Error in Windows 11?
Windows 11 users state that with the new update, they have encountered serious troublesome errors in the firewall.
These errors encountered cause some problems with the firewall.
This error is caused by the LSA protection not being enabled.
Failure to enable LSA protection will result in various such security errors.
How To Fix Local Security Authority Protection Is Off Error?
Under this heading, we will provide information on how to fix the errors encountered with the latest update to Windows 11.
Fix 1: Repair Windows Security
We can eliminate the error by using the troubleshooting tool that Windows has developed to fix the errors encountered in many of its tools.
We can eliminate the problem by repairing and resetting Windows Security.
- Type “Windows Security” in the start search screen, right click and click “App settings“.
- Click the “Repair” button in the new window that opens and start the repair process.
- After the repair is complete, click the “Reset” button and wait for it to complete.
After performing the actions, you can check whether the error has been fixed or not.
Fix 2: Changing RunAsPPL Values
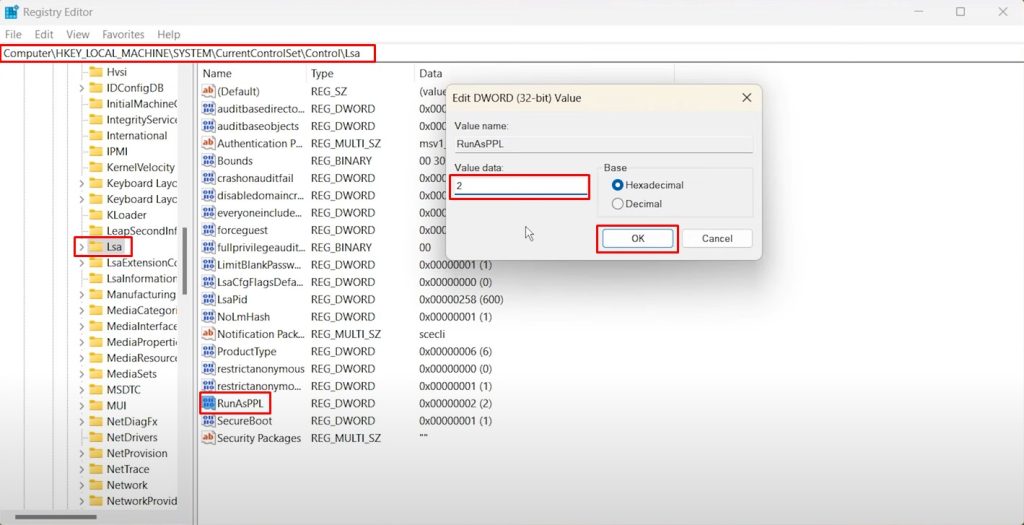
Some users on the Windows Forum state that they fixed the problem by editing the “RunAsPPL” registry via Regedit.
You can follow the step below to modify the “RunAsPPL” registry.
- Type “Regedit” in the start search screen and open it.
- Then get to “Computer\HKEY_LOCAL_MACHINE\SYSTEM\CurrentControlSet\Control\Lsa“.
- Double-click the “RunAsPPL” registry located in the “Lsa” folder.
- In the new window that opens, let’s change the “Value data” option to “2” and click the “OK” button and save.
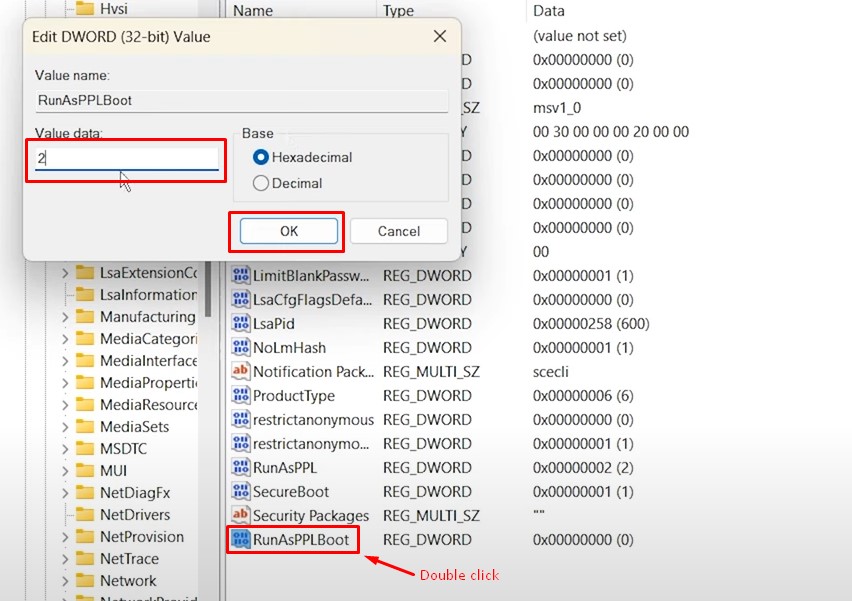
- Then right-click on an empty area and click “New > DWORD (32-bit) Value”.

- Change the registry name you just created to “RunAsPPLBoot“.
- Double-click the “RunAsPPLBoot” registry you created, change the “Value data” option to “2” and click the “OK” button.
After performing this operation, restart the computer and check.
If your problem persists, double-click the “RunAsPPLBoot” registry again, change the “Value data” option to “1” and save.
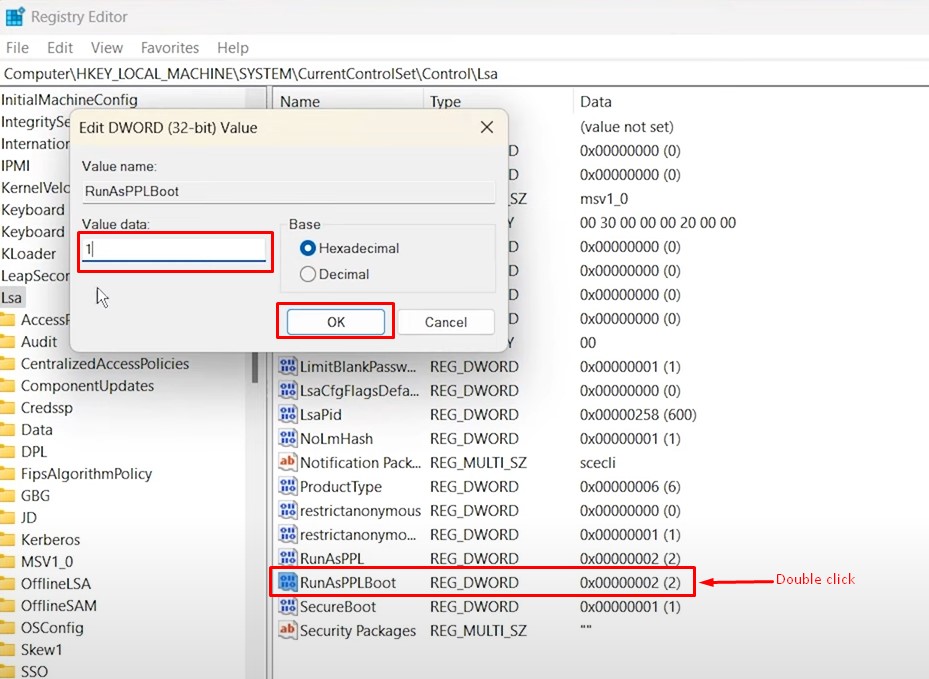
Then you can check by restarting the computer again.
Fix 3: Uninstalling Windows Latest Update
This error usually comes with the last update of Windows 11.
You can uninstall the last update to completely resolve the error.
You can follow the step below to uninstall the latest update in Windows 11.
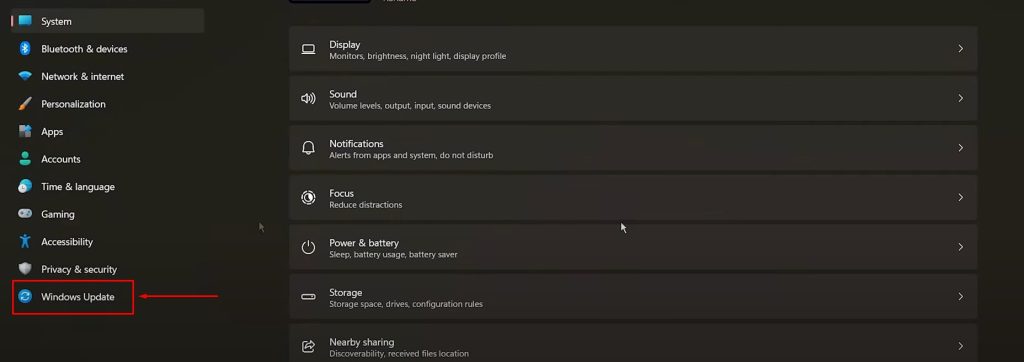
- Access the Windows 11 settings menu. To access “Right-click the Windows logo and click Settings.“
- Click on the “Windows Update” option on the left side of the Settings menu.
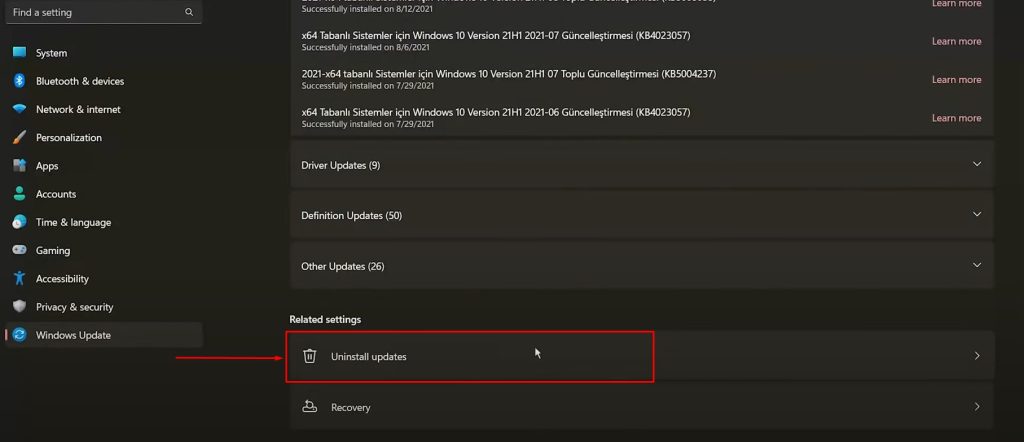
- Then scroll down and click on “Uninstall updates“.
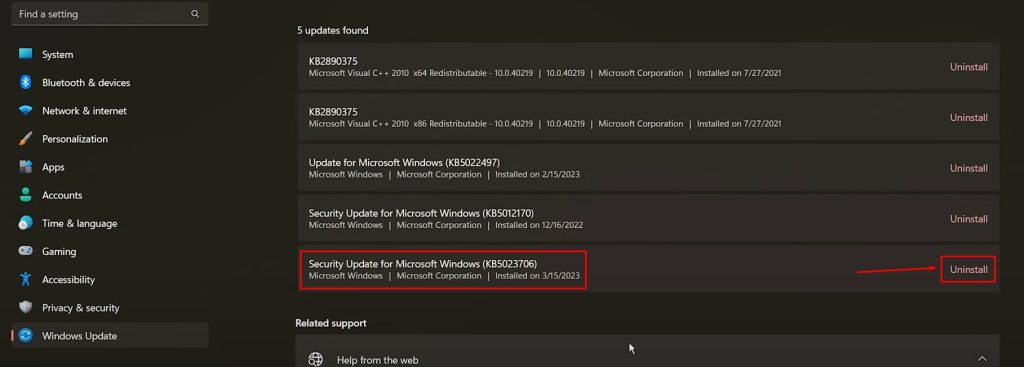
- On the new screen that opens, find the “KB5023706” update and click “Uninstall” to uninstall it.
After the deletion is complete, restart the computer and check.