

Are you facing the Generative Fill “Not Showing Up” issue in Adobe Photoshop?
Many drawings and animations can be made by using Adobe Photoshop by many graphic designers.
With the emergence of artificial intelligence recently, Adobe Photoshop has started to be used by many users after hearing about the generative fill artificial intelligence plug-in.
However, some Adobe Photoshop users are encountering the generative fill not showing up or not working issue.
In this guide, we will try to solve the Adobe Photoshop Generative “Fill Not Showing Up” or “Not Working” issue by providing information on how to fix it.
- Why is Adobe Photoshop Generative Fill Not Showing Up?
- How To Fix Photoshop Generative Fill Not Showing Up?
- Uninstall Adobe Photoshop Beta
- Check for Update
- Install Adobe Photoshop (Beta)
- How to Use Generative Fill in Adobe Photoshop?
Why is Adobe Photoshop Generative Fill Not Showing Up?
The Photoshop Generative Fill “Not Showing Up” or “Not Working” issue occurs as a result of the Photoshop Beta version not being updated.
In addition, the problematic operation of the Photoshop Beta application will also cause you to encounter the Generative Fill “Not Showing Up” problem.
Here are the reasons why you might encounter this issue:
- Adobe Photoshop (Beta) application does not work properly.
- Adobe Photoshop (Beta) application is out of date.
Generative Fill will not showing up in Adobe Photoshop for these two reasons.
How To Fix Photoshop Generative Fill Not Showing Up?
In this topic, we will solve the Adobe Photoshop Beta Generative Fill “Not Showing Up” or “Not Working” issue by showing a few suggestions on how to fix it.
1. Uninstall Adobe Photoshop Beta
Since the Generative Fill feature is new in Adobe Photoshop Beta, it needs to be updated.
Therefore, you need to check whether the Adobe Photoshop Beta application is up to date.
You can control this using the Creative Cloud Desktop application.
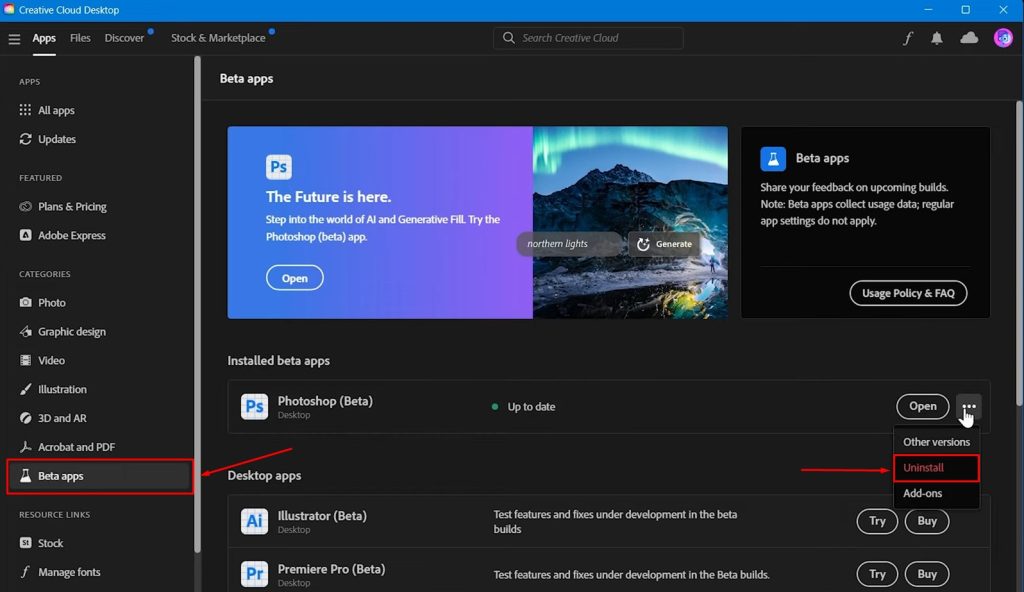
- Click and reach the “Beta apps” option in the left menu of the application.
- Then find the “Photoshop (Beta)” application and click on the three dots on its right side and click on “Uninstall“.
- In the window that appears, click the “Remove” button and proceed.
2. Check for Update
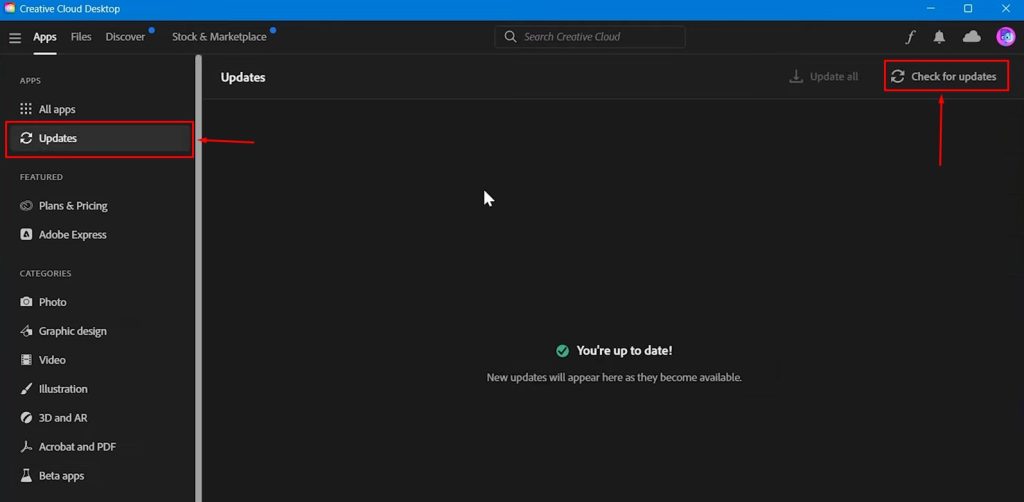
We can check for new updates using the “Check for updates” option within the Creative Cloud Desktop application.
- Open the Creative Cloud Desktop application and click “Updates” on the left.
- Click and scan the “Check for updates” option in the upper right corner of the screen that opens.
After the scanning process is complete, let’s install the Adobe Photoshop (Beta) application.
3. Install Adobe Photoshop (Beta)
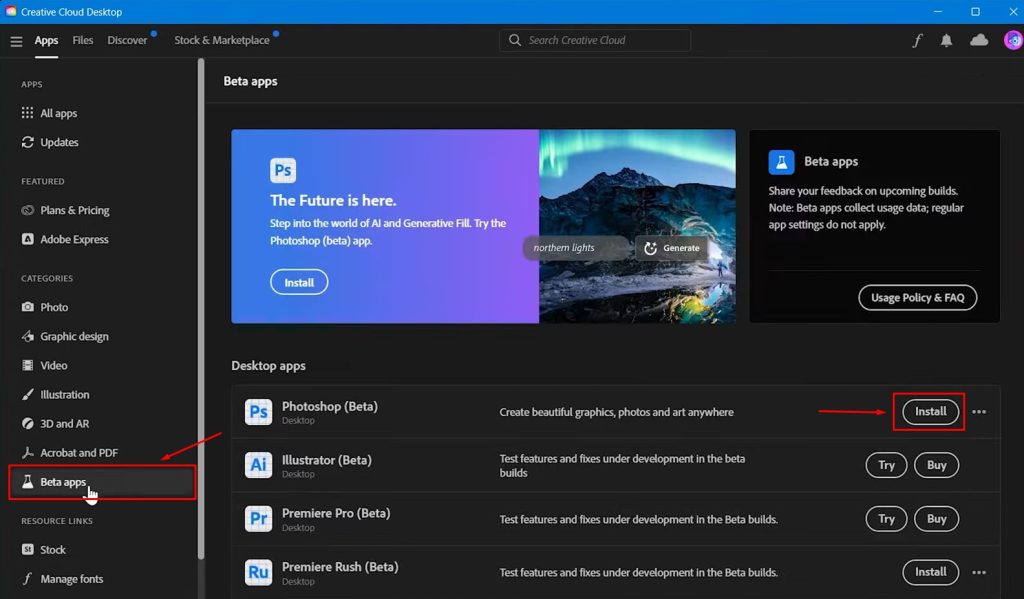
After checking the Creative Cloud update, let’s install Adobe Photoshop.
- Click on “Beta apps” on the left.
- Click the “Install” button on the right side of the “Photoshop (Beta)” application and wait for it to install.
After the installation is complete, run Adobe Photoshop (Beta) and check.
How to Use Generative Fill in Adobe Photoshop?
If you don’t know how to use generative fill AI in Adobe Photoshop, follow the step below:
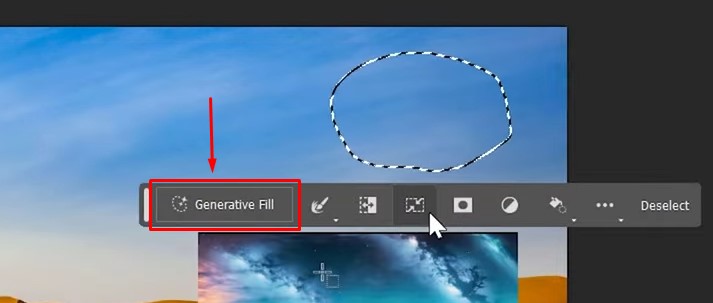
- Run Photoshop (Beta) application.
- Press the “L” key on the keyboard and mark any field.
- After marking the field, you will see the “Generative Fill” option.
- Then click on the “Generative Fill” option and type whatever you want from the artificial intelligence and click on the “Generate” button to ask it to create it.
Conclusion
As a result, we have solved the Generative Fill artificial intelligence plug-in not showing up or not working in Adobe Photoshop with 3 topics on how to fix it.
We have shown that this issue will occur with the use of the old version, and we have given suggestions on how to perform the update.
We also provided information on how to use the generative fill plugin.