

Are you getting a Couldn’t Upgrade error in CapCut?
CapCut is an editor program used on mobile, web or computer.
Users encounter this error when they want to update the CapCut application on the PC.
In this guide, we will try to resolve it by giving suggestions on how to fix the CapCut Couldn’t Upgrade error.
What is CapCut Couldn’t Upgrade Error?
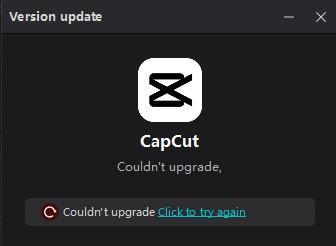
Users who want to update the CapCut application encounter the Couldn’t Upgrade error and cannot perform the update request.
This is usually observed in users who have internet problems.
In addition, the Capcut application not running with administrative privileges may also cause you to encounter such an error.
How To Fix CapCut Couldn’t Upgrade Error?
Under this heading, we tried to find a solution by giving information on how to fix the error.
1. Run CapCut Again
The cache problem in the CapCut application will cause you to encounter various errors like this.
Therefore, we can eliminate the problem by reconfiguring the cache files.
Completely close the CapCut application by running the task manager.
Then you can run the CapCut application again and check if the problem persists.
2. Run CapCut as Administrator
If the CapCut application does not run with administrative privileges, some functions may not be allowed to work.
Right-click on the CapCut application and run it as administrator and check if the problem persists.
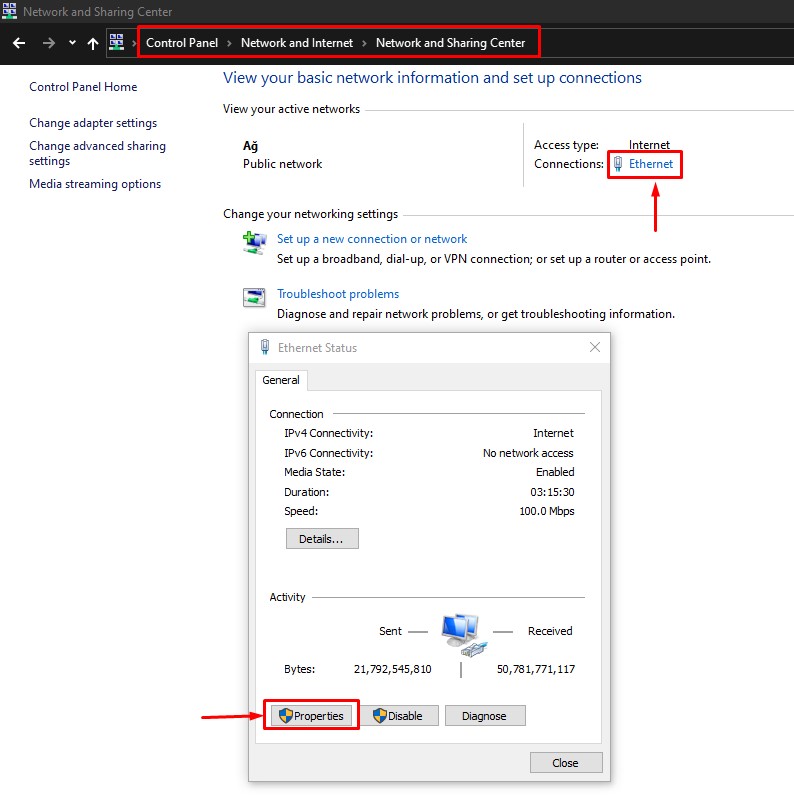
3. Use Default DNS
We can avoid connection request problems by using the default Google DNS server.
- Type “Control Panel” in the start search screen and open it.
- Click on the “Network and Internet” category title.
- Then click on the “Network and Sharing Center” heading.
- Click on the internet information next to “Connections:” on the screen that opens.
- Then click the “Properties” button.
- Double-click “Internet Protocol Version 4 (TCP/IPv4)“.
- Then check the “Use the following DNS server address:” option and type the address we left below.
- Preferred DNS server: 8.8.8.8
- Alternate DNS server: 8.8.4.4
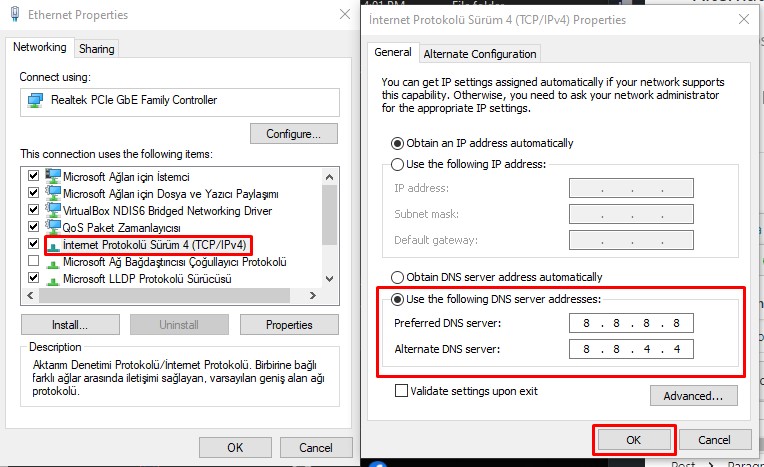
Click the “OK” button to save the setting and check.
4. Clear Internet Cache
The problem with the internet cache can cause you to encounter connection problems.
You can follow the steps below to fix the problems with the internet cache.
- Type “cmd” in the start search screen and run as administrator.
- Paste the following codes in the command prompt window and press enter.
- ipconfig /renew
- ipconfig /flushdns
- netsh int ipv4 reset
- netsh int ipv6 reset
- netsh winhttp reset proxy
- netsh winsock reset
- ipconfig /registerdns
After the process is complete, restart the computer and check.
5. Reinstall CapCut
Damage or corruption in the installed CapCut folder may cause you to encounter various errors like this.
Therefore, you need to completely uninstall and reinstall the CapCut application.
- Type “Run” in the start search screen and open it.
- Type “%localappdata%” in the search screen and open it.
- In the new window that opens, find the “CapCut” folder and delete it.
After deleting the folder, access the official CapCut website and download and install the installation file.